Moving to a remote area in Indonesia meant saying goodbye to fiber internet like Indihome or Biznet. The reality hit hard when I realized my options were either expensive local providers with snail-pace speeds or pricey wireless solutions like Starlink and Telkomsel Orbit.
Starlink? Way too expensive for my budget. Telkomsel Orbit? Also pricey, especially for their high-speed routers. Their cheap option maxed out at 15Mbps – not exactly what you’d call “high-speed internet” in 2025.
That’s when I discovered the TP-Link MR6400.
The Initial Disappointment
For roughly the same price as Telkomsel’s basic router, the MR6400 promised speeds up to 150Mbps according to their ads. I paired it with a byU SIM card (Telkomsel’s network has solid coverage in my area), which was giving me around 250Mbps on my Samsung A54. Plus, byU’s daily plan is pretty sweet – 10,000 rupiah for 10GB per day. Sure, I have to renew it every morning, but it beats paying monthly for overpriced plans.
Here’s where things got interesting (and frustrating): when I plugged that same SIM card into the router, my speeds dropped to a measly 40Mbps. Talk about false advertising, right?
Down the Rabbit Hole: Why 4G Routers Are Slower
Turns out, there’s a good reason why your phone gets better speeds than most 4G routers:
- Carrier Aggregation (CA): Modern smartphones can combine multiple LTE bands for faster speeds. Many budget routers can’t do this
- Modem category: Phones typically have more advanced modems
- Antenna quality: Phone antennas are often better optimized
- Band support: Routers might not support all the fast bands your carrier uses
So I started a little research by googling and discussing with ChatGPT, and I finally able to boost my speed to around 90Mbps. Here is my story.
The Speed Boosting Journey
Step 1: Manual Band Selection Magic
First thing I did was dive into the router’s admin panel and switch from automatic to manual band selection. This is where the real gains started happening.
How to find this setting: Open your web browser and go to tplinkmodem.net (or 192.168.1.1), then log in. Look for Advanced -> Network -> Internet -> Connection Type. Note: Manual band selection might require a special firmware update from TP-Link’s beta versions, as this feature isn’t available in all standard firmware versions.
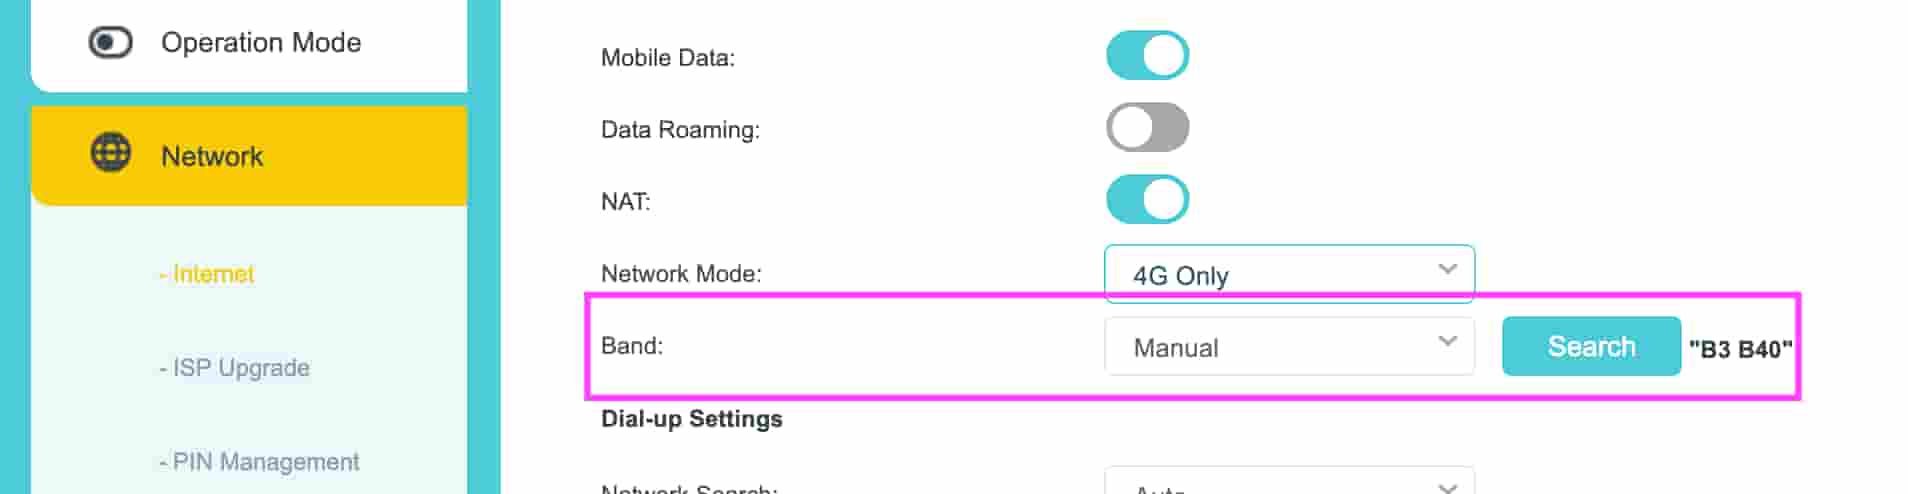
After testing different combinations, I found the sweet spot:
- Band 3 alone: Decent, but nothing special
- Band 40 alone: Slightly better
- Band 3 + 40 (Carrier Aggregation): Bingo! 🎯
This combo pushed my speeds from 40Mbps to around 70Mbps. I completely ignored the slower bands (1, 5, and 8).
Step 2: Location, Location, Location
Router placement matters more than you’d think. I moved mine:
- Farther from metal objects
- To a slightly elevated spot (on top of my cupboard)
This simple change improved my signal quality and helped the router lock onto faster bands more consistently.
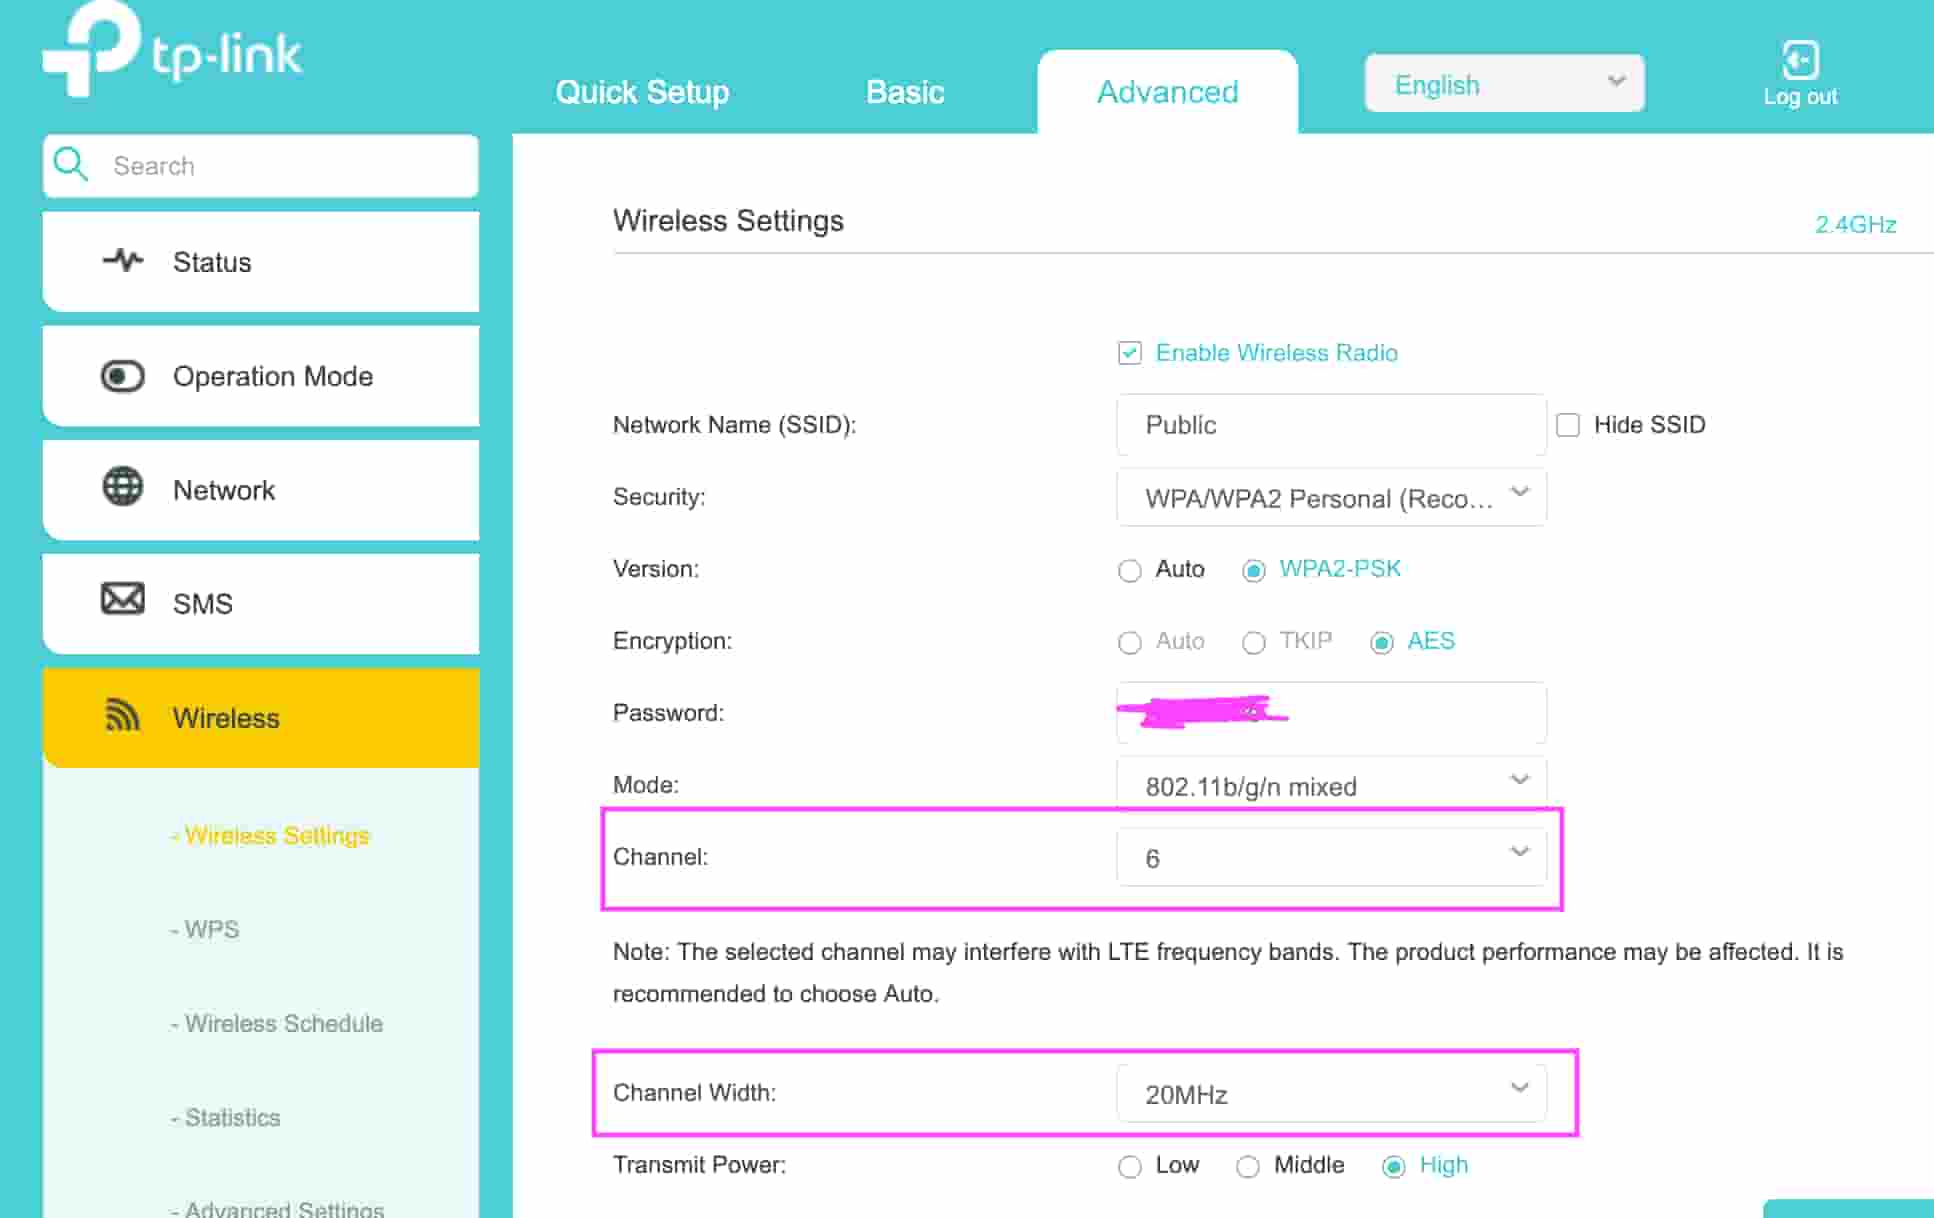
Step 3: Wi-Fi Channel Optimization
Here’s where I got even more performance:
Channel Selection: Switched from Auto to Channel 6 manually. To change this: go to Advanced -> Wireless -> Wireless Settings, then find the “Channel” dropdown and select Channel 6 (channels 1, 6, and 11 work best for most people).
Channel Width: Set it to 20 MHz instead of letting it go wider. You’ll find this near the Channel setting - just change it from “Auto” to “20 MHz”. These settings bumped my speeds from 70Mbps to around 90Mbps.
Step 4: Additional Security & Performance Tweaks
Time to clean house with some settings that were just eating up resources:
Disabled UPnP: Look for this in Advanced -> NAT Forwarding -> UPnP. UPnP automatically opens ports for devices, but it was using bandwidth in the background for no good reason. Don’t worry – my printer still works fine, and video calls are unaffected since they use standard web connections.
Turned off WPS: You’ll find this in Advanced -> Wireless -> WPS. WPS (Wi-Fi Protected Setup) is supposed to make connecting devices easier, but it’s basically a security risk waiting to happen. Better safe than sorry.
Disabled Remote Management: Go to Advanced -> System Tools -> Administration and turn off “Remote Management”. This prevents people from accessing your router settings from outside your home network – which you definitely don’t want.
The Results
After all these tweaks, I went from a disappointing 40Mbps to 90Mbps – more than double the original speed! While it’s not quite the 150Mbps advertised, it’s definitely good enough for my family’s daily needs.
Quick Settings Checklist
If you want to try these optimizations on your own 4G router, here’s the action plan:
Cell Network Settings:
- Switch to manual band selection (may need beta firmware)
- Test Band 3 + 40 combination (adjust based on your carrier)
- Move router to better location (near window, elevated spot)
Wi-Fi Settings:
- Set channel to 6 manually
- Change channel width to 20 MHz
Security & Performance:
- Disable UPnP
- Turn off WPS
- Disable remote management
- Consider scheduling auto-reboot at 3 AM
Getting to the settings: To access all these menus, open your web browser and go to tplinkmodem.net or 192.168.1.1, then log in with your admin password (usually printed below the router).
Final Thoughts
Look, 4G routers aren’t perfect, but with some tweaking, you can definitely get more from your buck. The TP-Link MR6400 might not hit its advertised speeds out of the box, but it’s still a solid choice for remote areas where fiber isn’t available.
The key is understanding that these devices need some manual optimization to perform their best. Don’t just plug and play – dive into those settings and make them work for your specific situation.
Now I’ve got reliable internet that handles video calls, streaming, and daily browsing without breaking the bank. Sometimes you just have to roll up your sleeves and optimize things yourself!